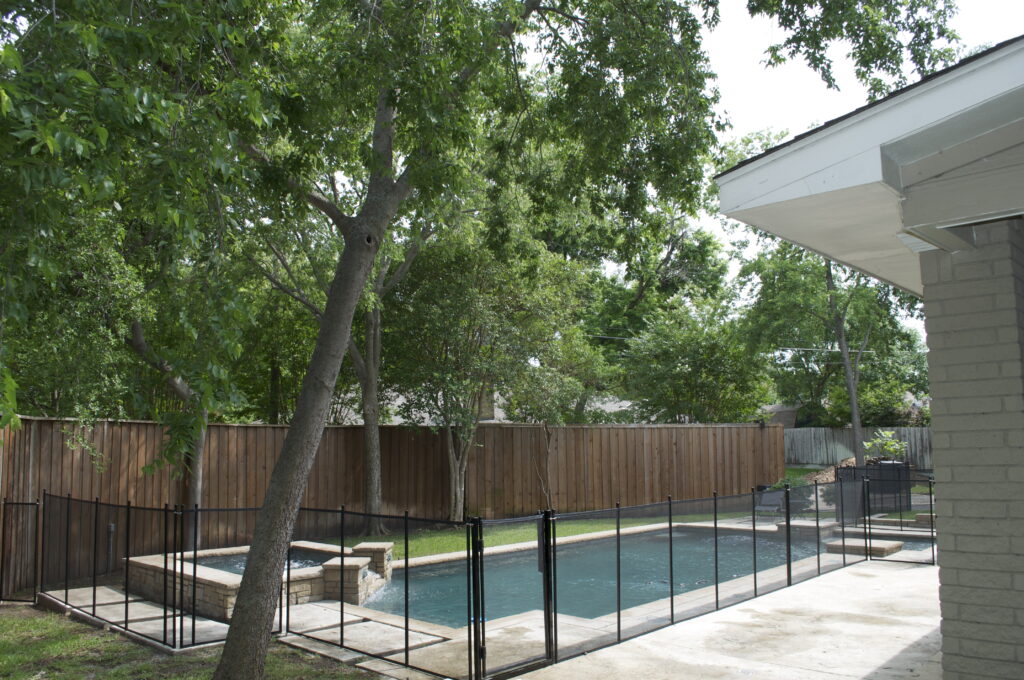
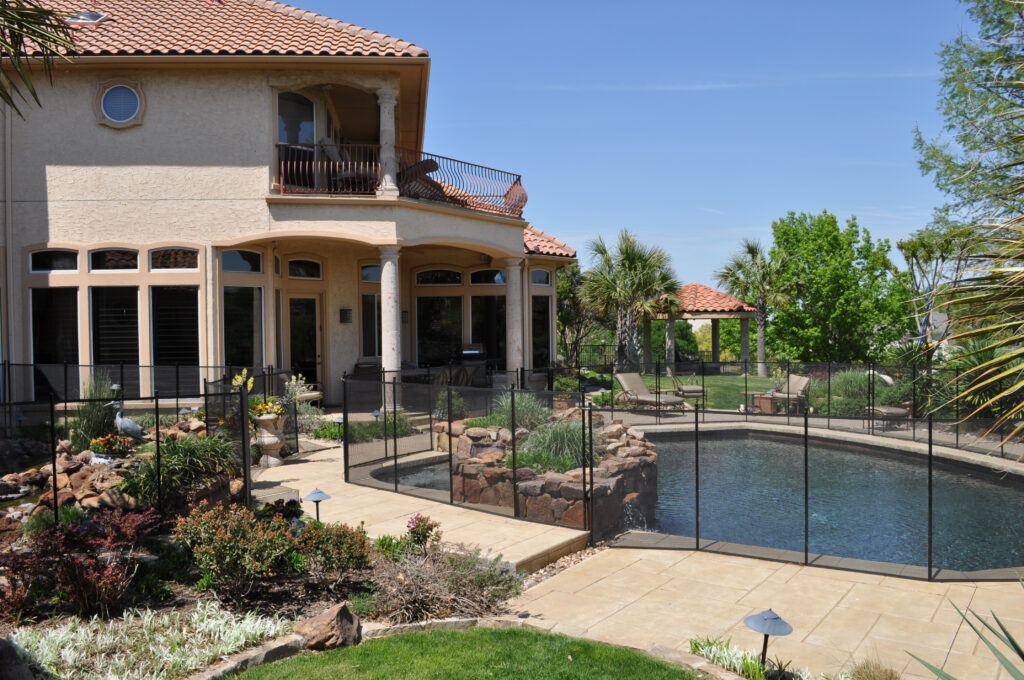
Each year, nearly 300 children under the age of five lose their lives to pool drownings—statistics that the U.S. Consumer Product Safety Commission says could be dramatically reduced by a fully fenced barrier. Removable mesh pool fences combine climb-resistant strength, clear visibility, and hassle-free removal, making them a proven line of defense around your backyard oasis.
This article guides you through five essential phases, ensuring your barrier meets national standards and stands up to the test of time. You’ll find clear, actionable steps for:
- Compliance: Decoding CPSC, ANSI/APSP, and local code requirements
- Planning: Assessing your site and mapping an effective fence path
- Material Selection: Picking mesh, poles, gates, and hardware built to last
- Installation: Executing precise drilling, sleeve placement, and panel tensioning
- Upkeep: Establishing cleaning, inspection, and seasonal storage routines
Let’s walk through each phase to achieve a professional-quality installation that keeps children and pets safely out of harm’s way.
Step 1: Understand Pool Fence Safety Standards
Before you pick up your drill, it’s crucial to get familiar with the rules that govern pool barriers. National safety guidelines aren’t just red tape—they exist to prevent the kind of tragic accidents that happen when a child or pet gains unsupervised access to water. By building your removable pool fence to these standards, you’re creating an effective, code-compliant defense that homeowners, inspectors, and insurers all respect.
Review CPSC Barrier Guidelines
The U.S. Consumer Product Safety Commission (CPSC) offers clear, research-backed guidance on home pool barriers. Key requirements include:
- Minimum barrier height of 48″ above final grade
- Maximum clearance below fence: 4″
- Spacing between vertical members (or mesh openings) ≤ 4″
- Gate release mechanism mounted ≥ 54″ above ground level
CPSC emphasizes that “Many of the nearly 300 children under 5 who drown each year… could be saved if homeowners completely fenced in pools… ¹. Properly following these dimensions and configurations makes it far harder for a toddler—or a curious pet—to slip through or climb over.
Outline ANSI/APSP/ICC-8 Structural Requirements
Beyond basic dimensions, industry standards under ANSI/APSP/ICC-8 specify performance and construction details:
- Mesh must meet the tensile strength criteria of ASTM F2286 (typically ≥ 387 psi) to resist tearing or puncture.
- Support posts are spaced and anchored to withstand lateral forces; posts should remain plumb under a 100 lbf horizontal load.
- Reinforced border stitching (quad-stitch) and folded hems prevent fraying at corners and edges.
- Anchoring sleeves must be installed in materials at least 4″ thick, ensuring sleeves don’t pull out under tension.
These structural benchmarks ensure your fence holds firm, even when tested by wind, swimmers, or accidental bumps. For full specifications, refer to the ANSI/APSP/ICC-8 standard².
Define Key Measurements and Regulations
Every jurisdiction may tweak these rules, so always compare national benchmarks with local amendments. Here’s a quick reference for core dimensions:
Element | Requirement |
Barrier Height | ≥ 48″ (4 ft) above grade |
Bottom Clearance | ≤ 4″ between ground and fence |
Vertical Member Spacing | ≤ 4″ |
Gate Release Height | ≥ 54″ above ground level |
Note: Some states mandate a 60″ minimum height or additional anti-scale features. Check with your local building department to confirm any jurisdictional variations before you begin.
Step 2: Conduct Site Assessment and Planning
Before drilling a single hole, take time to survey your pool area. A thorough site assessment prevents missteps, like sleeves in the wrong spot or a fence that doesn’t follow your pool’s contours. Start by sketching a rough map of your backyard, noting dimensions, changes in elevation, and any features that might interfere with a straight fence line. Armed with a tape measure, chalk, and a camera, you’ll capture all the details needed for a smooth installation.
Measure Distance from Water’s Edge
Maintain a safe buffer between your pool and fence. We recommend at least 24″ of clearance from the water’s edge to the inside of the barrier. This gap allows you to perform routine maintenance, like skimming leaves or retrieving stray toys, without opening the fence. Anything less than 18″ creates a cramped workspace and increases the chance you’ll have to step through the fence, defeating its purpose.
To get it right:
- Use a tape measure to locate key reference points around the pool.
- Mark each point with chalk or spray paint on the deck surface.
- Re-measure between marks to confirm you’ve got consistent 24″ spacing all the way around.
Identify Structural and Landscape Obstacles
Your pool deck is rarely a blank canvas. Deck drains, sprinkler heads, planters, lounge chairs, and even fallen leaves can throw off pole spacing or create unwanted footholds. Make a checklist of potential impediments:
- In-deck drains or scuppers
- Embedded sprinkler heads
- Fixed furniture (benches, built-in seating)
- Raised garden beds, pots, or statues
- Uneven surfaces, deck-level changes, or step-downs
Walk the entire perimeter, snapping photos of each feature. Note anything a child or pet might use to climb the fence. If you spot a serious obstruction, like a large planter or a grill island, plan to reroute your fence line so it stays at least 36″ away from climbable objects.
Plan Fence Path and Gate Location
With measurements and obstacles mapped, it’s time to plot the exact fence path and gate spot. Ideally, your gate should align with the pool steps or primary entry point, minimizing the temptation to open the fence elsewhere. Avoid adding extra gates or cuts; each opening is a potential failure point.
When laying out your path:
- Keep runs as straight as possible, using gentle curves around rounded pool edges.
- At corners, aim for gradual bends rather than tight 90° turns to maintain consistent tension in the mesh.
- Sketch the final layout on your map, marking sleeve positions every 36″ on center, tighter at bends or unusual angles.
A clear, well-documented plan not only speeds up installation but also helps ensure your removable pool fence works exactly as designed: a seamless, code-compliant barrier that keeps children and pets out of harm’s way.
Step 3: Select Durable, Code-Compliant Materials
Picking the right components is essential for a removable pool fence installation that both holds up over time and satisfies safety codes. Cutting corners on material quality can compromise performance, shorten service life, and even put you out of compliance. Here’s what to look for when specifying mesh, support poles, sleeves, and the gate system.
Choose High-Strength Mesh Fabric
The mesh panel is your first line of defense, so it needs to deliver on strength, visibility, and weather resistance. We recommend Textilene® polyester mesh certified to ASTM F2286, with a typical tensile strength of 387 psi. This marine-grade material:
- Stands up to UV exposure, chlorine, and salt water without fading or cracking
- Remains transparent enough for easy pool monitoring, yet dense enough to block little hands and paws
- Comes in popular colors (black, brown, tan, and green) so you can balance sightlines, aesthetic preferences, and privacy needs
A tightly woven Textilene® mesh with quad-stitch borders not only prevents unraveling but also maintains tension over years of use. Pool Guard™ backs every fabric panel with a lifetime warranty, so you know it won’t let you down.
Select Solid Core Aluminum Poles and Sleeves
Your fence poles and mounting sleeves form the structural skeleton of the barrier. For maximum rigidity and corrosion resistance:
- Opt for marine-grade, powder-coated aluminum poles—1″ diameter with a minimum 0.50″ wall thickness—to resist dents, rust, and bending under tension.
- Choose sleeves sized to match your pole diameter: aluminum sleeves provide a snug, permanent anchor, while non-conductive polypropylene sleeves offer a lightweight alternative that’s still core-drilled into the deck.
- Ensure sleeves are installed in material at least 4″ thick (concrete, pavers, or properly set flagstone) so they won’t pull out under wind or accidental bumps.
Quality poles and sleeves keep your fence plumb and prevent sagging, even after years of seasonal installation and removal.
Pick a Self-Closing, Self-Latching Gate System
Gates are the one part of your barrier that must operate flawlessly every single time. A self-closing, self-latching design means there’s no need to remember to shut or lock it manually, critical when small children are around. Look for:
- A 1-1/2″ heavy-gauge aluminum frame (square or arched) that matches your fence poles in finish and strength
- An enclosed stainless-steel spring latch mechanism that resists corrosion and keeps fingers safe from pinch points
- A release lever or key-lock to meet the CPSC’s ≥54″ mounting height requirement and secure the opening when it’s not in use
For a versatile range of gate styles and custom configurations, check out the self-closing, self-latching fencing options at Pool Guard USA. Their systems integrate seamlessly with Textilene® mesh panels and reinforced poles for a cohesive, code-compliant barrier.
With top-tier mesh, robust poles, and a reliable gate system in place, you’ll have the building blocks for a removable pool fence installation that keeps children and pets out of harm’s way, season after season.
Step 4: Gather Essential Tools for Installation
Before you crack open your deck or drill a single hole, assemble your toolkit. Having every item on hand not only saves time but also ensures each hole, cut, and measurement meets the precise tolerances needed for a sturdy, code-compliant fence. Below is a breakdown of the must-have power tools, hand tools, and safety gear to keep your installation running smoothly from start to finish.
Power Drill and Drill Bit Selection
A quality hammer drill is the workhorse of your installation. Opt for a 1 1/8″ masonry bit capable of drilling at least 4″ deep into concrete, pavers, or flagstone. If your drill has a built-in depth stop, set it to the required sleeve depth; otherwise, wrap tape around the bit at the 4″ mark as a visual guide. Cordless rotary-hammer models offer mobility, but ensure the battery pack is fresh or keep a spare on hand to avoid downtime.
Hand Tools and Measuring Equipment
Precision starts with simple hand tools, and you’ll use each of these throughout the project:
- Tape measure (at least 25′) for marking sleeve locations and verifying fence height
- Chalk line to snap straight reference lines around curved or angular pool perimeters
- 4-foot level to confirm sleeves are plumb before securing mesh panels
- Rubber mallet for gently seating poles into sleeves without denting them
- T-bar wrench or socket set to tighten sleeve set-screws and gate hardware
Having these tools ready means you won’t have to improvise with makeshift solutions that risk misalignment or loose fittings.
Personal Protective Equipment and Sealants
Safety and longevity go hand in hand. Equip yourself with:
- Safety glasses to shield your eyes from concrete dust and flying debris
- Work gloves with a good grip for handling rough materials and metal edges
- Hearing protection, especially during prolonged drill use on hard surfaces
Additionally, plan on exterior-grade silicone sealant to weather-proof sleeve flanges. A smooth bead around each plate prevents water from seeping beneath the fence line and guards against freeze-thaw cycles. With tools and PPE prepped, you’re ready to move on to the hands-on layout and drilling stages, confident that you’ve covered every detail.
Step 5: Layout and Mark the Fence Perimeter
Accurate layout is the foundation of a flawless installation. Taking the time to mark your fence path precisely prevents re-drilling, ensures consistent tension, and keeps your panels plumb and gap-free. In this phase, you’ll translate your plan into paint and chalk lines—positioning every sleeve and reference point before a single hole is drilled.
Begin by reviewing your site map and measuring twice. Walk the entire perimeter, double-checking the 24″ buffer from the water’s edge you established in Step 2. With those dimensions confirmed, you’re ready to snap lines and pinpoint each mounting location.
Snap Chalk Lines and Reference Points
Use a high-visibility chalk line to connect your measured points. Stretch the line taut between two end markers—ideally stake flags or weighted objects—to draw a straight guide on the deck. If you’re working around a curved pool, break the run into shorter segments, snapping multiple lines that approximate the arc. After each chalk line, run a level along the mark to confirm it sits flush with the deck and that it’s parallel to the water’s edge.
For more complex layouts, like bends or offsets around deck drains, create temporary wooden or PVC reference stakes. Drive each stake at the exact sleeve location, then tie a string line between them. This string acts as a visual cue when you move on to marking sleeve centers.
Mark Sleeve Locations at Proper Intervals
With your primary guide in place, mark the exact center of each mounting sleeve. Standard spacing is 36″ on center, but tighten intervals to 30″ or even 24″ on sharper curves and at corners. A consistent rhythm of sleeves keeps the mesh under uniform tension, eliminates sagging, and prevents kids or pets from exploiting gaps.
To mark each sleeve:
- Measure 36″ along your chalk line (or string) from your starting point.
- Place a small “X” with spray paint or chalk at that spot.
- Continue along the run, verifying each measurement against the original reference stake to avoid cumulative errors.
At each corner or bend, double-check your spacing against the plan. It’s better to adjust one panel now than to wrestle with misaligned holes during installation.
Perform Final Pre-Drill Inspection
Before grabbing the drill, take a moment for one last safety check:
- Call 811: Confirm there are no underground utilities—gas, electric, water, or irrigation lines—beneath your drill points. It’s free, quick, and legally required in most states.
- Confirm Deck Thickness: Verify the deck is at least 4″ thick at every marked sleeve. Thin or cracked surfaces may need reinforcement or relocation of the sleeve.
- Inspect Surface Condition: Clear away dirt, debris, and loose concrete. A clean deck ensures your hammer drill bites firmly and your sleeves sit flush.
Once you’ve completed this inspection and resolved any issues, your layout is locked in, and you’re ready to move on to drilling and sleeve installation in Step 6. Remember: careful preparation here pays dividends in speed and accuracy down the road.
Step 6: Drill Deck and Install Mounting Sleeves
Accurate drilling and sleeve placement lay the groundwork for a straight, sturdy fence line. Mounting sleeves act as anchors, transferring mesh tension into your deck slab and keeping poles plumb throughout seasons of installation and removal. In this phase, you’ll drill precise holes, seat sleeves at the correct depth, and weatherproof each flange to lock in stability.
Drill Holes to Correct Depth and Angle
Begin with your hammer drill outfitted with a 1-1/8″ masonry bit. Set a clear depth guide—either a built-in stop or a piece of tape at 4″ from the bit tip—to prevent over-drilling. Position the drill perfectly vertical over each marked “X” and start at low speed to create a clean pilot indentation. Increase to hammer mode, drilling straight down until the bit reaches the depth mark. Avoid angling the drill, as even a slight lean can make poles sit crooked, compromising tension and alignment.
Insert and Level Mounting Sleeves
Once holes are drilled, clear out all concrete dust with a shop vacuum or compressed air. Slide each sleeve into its hole, tap it gently with a rubber mallet until the flange sits flush with the deck surface, and immediately verify plumb with a 4-foot level. Proper sleeve depth and vertical orientation ensure that when you install the mesh panels, bilateral tension—the opposing pull on both sides of the fence—holds sleeves firmly in place, preventing any wobble under wind loads or accidental impact.
Protect Deck Surface and Seal Around Sleeves
To guard against moisture infiltration and freeze-thaw damage, apply a thin bead of exterior-grade silicone sealant around the outer edge of each sleeve flange. Smooth the sealant with a gloved finger or tooling spatula for a neat finish. If you remove the fence for off-season storage, snap on low-profile deck caps over each sleeve. These caps keep debris out of the sleeve bore, preserving the integrity of your foundation for the next installation cycle.
Step 7: Install Poles and Attach Mesh Panels
With your sleeves secured and sealed, you’re ready to bring the fence panels to life. This phase is where precision meets patience—getting poles plumb and mesh taut ensures the barrier remains climb-resistant and gap-free. Work methodically, section by section, and refer back to your plan if any spacing or alignment seems off. Let’s break down the process into three key tasks.
Position Poles and Connect Mesh Panels
Begin by unrolling your first mesh panel alongside the fence line, keeping the bottom border close to the deck. One installer should slide a pole vertically into the first sleeve, while a second person holds the mesh border up against the pole. Most mesh systems feature reinforced grommets or hooks along the vertical edge of each panel—engage these one by one, starting from the top and working downward. As you drop the mesh into place, ensure the bottom edge remains flush with the deck surface to eliminate any clearance a child or pet could exploit.
Once the first pole and mesh panel are connected, repeat the process for the next section: slide in the adjacent pole, align its mesh edge, and hook it securely. Keep both poles plumb with your level, and verify that each panel’s top border sits at a consistent height—this visual check prevents uneven runs that can lead to sagging later.
Trim Excess Mesh and Inspect Seams
Once all panels are tensioned and fastened, you may notice extra mesh extending past the final sleeve or overlapping around corners. Use a sharp utility knife to trim this excess, following the edge border as your guide. Roll the scraps neatly—never leave loose ends that could snag or unravel.
Finally, walk the entire fence line and examine each seam. Check that the quad-stitched borders at corners remain tightly woven and show no signs of tearing. If you spot a weak stitch or fraying edge, reinforce it with a few stitches of UV-resistant thread or apply a small drop of marine-grade adhesive. Regular seam inspections keep the barrier robust season after season.
For additional tips on mesh panel maintenance and common troubleshooting, you can consult the detailed pool fence info at Pool Fence Info. With the poles plumb, mesh taut, and seams inspected, your removable pool fence is now a solid, code-compliant barrier that’s ready to protect children and pets alike.
Step 8: Install Self-Closing, Self-Latching Gate
The gate is the only opening in your pool fence, so its operation must be flawless. A properly installed self-closing, self-latching gate ensures there’s no chance a small child or pet can wander in unnoticed. In this step, you’ll learn how to assemble the gate frame, secure it with hinges, adjust its swing direction, and install the latch mechanism to meet the CPSC’s ≥54″ requirement.
Assemble Gate Frame and Mount Hinges
Begin by laying the gate frame flat on a clean, level surface. Attach the hinges to the frame per the manufacturer’s instructions—typically two hinges on the pool side of the gate.
- Position the hinge mounting plates at the specified locations on the top and bottom rails.
- Tighten hinge screws evenly so each plate sits flush against the frame.
- Lift the assembled gate and mate each hinge leaf with its pre-installed post-side plate.
Once hung, measure the diagonals of the gate frame; they should match within 1/8″. A square frame prevents racking and keeps the closing action consistent.
Adjust the Gate to Swing Away from the Pool
Safety codes mandate that gates swing away from the water, preventing a person in the pool from trapping the gate open. To set the correct swing:
- From inside the fenced area, open the gate fully; it must pivot at least 90° away from the pool.
- If the gate binds or swings unevenly, insert thin nylon or stainless-steel shims behind the hinge leaves for fine adjustments.
- Confirm smooth, obstruction-free motion after each shim adjustment.
- Check that the bottom of the gate clears the deck by ¼″–½″ to prevent dragging.
Proper hinge spacing and swing direction ensure the gate can always close under its weight.
Install and Test Latching Mechanism
With the gate square and swinging properly, mount the latch assembly:
- Mark the latch plate location so the top of the release lever is at least 54″ above the final grade—the CPSC minimum.
- Pre-drill pilot holes with a 1/8″ bit, then secure the latch plate with corrosion-resistant screws.
- Position the striker (strike box) on the receiving post so the latch bolt engages cleanly without forcing.
- Test the self-closing feature by pulling the gate to 90° and releasing; it should fully close in under 5 seconds.
- Operate the latch multiple times to verify positive engagement. If equipped with a keyed lock, confirm smooth locking and unlocking.
Consistently closing and latching every time is non-negotiable for a safe barrier. For more details on gate options and ensuring reliable operation, see our guide on self-closing, self-latching gates.
Step 9: Perform Final Inspection and Compliance Check
Installation is only half the battle. A thorough final inspection confirms that every component of your removable pool fence meets safety codes and works as intended. Walk the entire perimeter with your tape measure, level, and a pre-printed checklist—double-checking dimensions, hardware operation, and proper documentation ensures a barrier you can trust.
Verify Fence Height and Gap Measurements
Begin by verifying critical dimensions at multiple points around the fence:
- Measure the top rail height with a tape measure; it should be at least 48″ above the finished deck everywhere.
- Use a feeler gauge or ruler to check the clearance beneath the mesh; it must never exceed 4″.
- Inspect mesh openings or vertical member spacing, ensuring gaps are no wider than 4″.
- At the gate, confirm the latch release is mounted at least 54″ above grade.
If you find any section falling short—say the deck slopes or a sleeve settled unevenly—adjust the pole or tighten the fasteners. Even small variances can create footholds or weak spots that defeat the barrier’s purpose.
Test Gate Function and Security
The gate is your system’s only entry point, so it must operate flawlessly:
- Swing the gate open to 90° and let it close on its own; it should latch within 5 seconds without hesitation.
- Engage the self-latch and, if equipped, the keyed lock multiple times to confirm reliable locking.
- Check hinge alignment with a level—no sagging, binding, or dragging on the deck (ideal clearance: ¼″–½″).
- Make sure the gate consistently swings away from the pool, as required by CPSC guidelines.
Think like a curious toddler or pet: if you can find a way to keep the gate ajar, so can they. Tackle any sticking points or loose fittings until the gate closes smoothly every time.
Step 10: Establish Maintenance and Inspection Routine
Maintaining your removable pool fence ensures it remains a reliable barrier year after year. By setting up a regular schedule of cleaning, hardware checks, and proper off‐season storage, you’ll preserve both safety and curb appeal. Below are three key areas to include in your maintenance plan.
Regular Cleaning and Mesh Care
Even the toughest Textilene® mesh can accumulate grime, algae, or mineral deposits over time. Aim to give your panels a gentle wash every three months:
- Mix a solution of mild, non-abrasive soap and warm water.
- Use a soft brush or cloth to scrub both sides of the mesh, paying attention to the reinforced borders.
- Rinse thoroughly with a garden hose to remove all soap residue and debris.
Regular cleaning not only keeps your fence looking fresh but also prevents mold and mildew from degrading the fibers.
Periodic Hardware and Tension Checks
A fence is only as strong as its weakest fastener. Schedule an annual inspection—ideally at the start of each swimming season—to verify that every component is secure and corrosion-free:
- Walk the perimeter and check poles and sleeves for signs of rust, cracks, or loosening.
- Inspect screws, fasteners, and gate hinge.
- Test mesh tension by pressing gently on the panels; if they sag under light force, re-tension the borders by adjusting fastener spacing.
A few minutes of preventive maintenance can prevent major repairs and keep your barrier consistently climb-resistant.
By integrating these tasks into your routine, your removable pool fence will continue to look great and, most importantly, keep children and pets safely out of the pool area.
Next Steps to Keep Your Pool Safe
You’ve mapped out the regulations, planned your layout, selected top-quality materials, and installed a code-compliant barrier—and that puts you miles ahead in protecting kids and pets around your pool. Now it’s time to turn that momentum into long-term peace of mind. Staying vigilant with routine checks, seasonal care, and professional support will keep your fence performing at its best.
Follow these simple action items to wrap up your project and lock in safety:
- Schedule a professional inspection: Even the most DIY-savvy homeowners benefit from a second set of eyes. A certified Pool Guard™ technician can verify measurements, tension, and hardware operation to ensure nothing has slipped through the cracks.
- Commit to regular upkeep: Clean your mesh quarterly, inspect poles and sleeves annually, and retension panels whenever you notice slack. Simple maintenance preserves the barrier’s integrity and extends its service life.
- Educate your household: Make sure every family member, pet sitter, and guest understands how the gate operates—and why it must stay closed. A quick demo goes a long way toward preventing accidental lapses.
- Document and review: Keep a dated record of inspections, service visits, and any repairs. Having clear documentation can ease future code inspections and give you confidence that your pool area remains fully compliant.
Ready to turn these next steps into action? For a free estimate and professional installation by Pool Guard™, visit poolsafetyfences.com or call us today.